みなさんこんにちは!GASおじさんです。
「GAS x HTMLで確認画面付きの本格的な発注フォームを作ろう」シリーズの第9回です。
前回の記事はこちら。
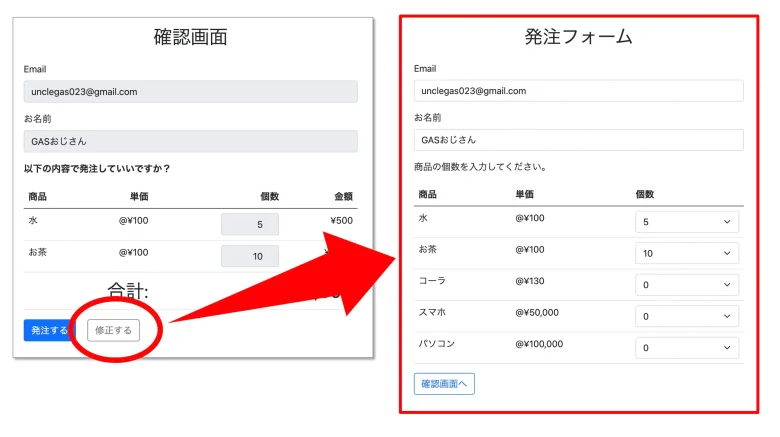
前回は確認画面ページの「修正する」ボタンを実装しました。
今回は確認画面ページで「発注する」ボタンをクリックした後の動きを実装していきましょう。
Youtubeでも解説していますので、動画で見たい方は以下からどうぞ。
Part1: createOrder関数の実装
Part2: updateZaiko関数の実装
Part3: sendMail関数の実装
確認画面ページの「発注する」ボタンクリック後の機能を実装しよう
「発注する」ボタンをクリックしたら、
- スプレッドシートに記録
- 商品の在庫数を更新
- 発注完了メールの送付
の3つが機能するように実装していきます。
まずはコード.gsのdoPost関数を、以下のように書き換えましょう。
function doPost(e) {
  const items = getAllRecords('商品');

  // index.htmlで「確認画面へ」ボタンが押されたらconfirm.htmlへ
  if(e.parameter.confirm) {
    const template = HtmlService.createTemplateFromFile('confirm');
    template.deployURL = ScriptApp.getService().getUrl();
    template.confirmHTML = getConfirmHTML(e, items);
    const htmlOutput = template.evaluate();
    return htmlOutput;
  }

  // confirm.htmlで「修正する」ボタンが押されたらindex.htmlへ
  if(e.parameter.modify) {
    const template = HtmlService.createTemplateFromFile('index');
    template.deployURL = ScriptApp.getService().getUrl();
    template.formHTML = getFormHTML(e, items);
    const htmlOutput = template.evaluate();
    return htmlOutput;
  }

  // confirm.htmlで「発注する」ボタンが押されたらcomplete.htmlへ
  if(e.parameter.submit) {
    createOrder(e, items);
    updateZaiko(e, items);
    sendMail(e, items);
    const template = HtmlService.createTemplateFromFile('complete');
    template.deployURL = ScriptApp.getService().getUrl();
    const htmlOutput = template.evaluate();
    return htmlOutput;
  }
}
24〜26行目を追加しました。ここで3つの関数を呼び出しています。
それぞれ、
- createOrder関数・・・スプレッドシートに記録
- updateZaiko関数・・・商品の在庫数を更新
- sendMail関数・・・発注完了メールの送付
という役割をもった関数ですね。これらの関数を定義していきましょう。
createOrder関数
まずはcreateOrder関数です。コード.gsに以下のコードを追加で貼り付けてください。
function createOrder(e, items) {
  // 注文テーブルに単一レコードを追加する
  const orderId = generateId();
  const order = [orderId, new Date(), e.parameter.email, e.parameter.username];
  addRecords('注文', [order]);

  // 注文_商品テーブルに複数レコードを追加する
  const records = [];
  for(const item of items) {
    const itemId = item['商品ID'];
    const count = Number(e.parameter[itemId]);
    if(count > 0) {
      const record = [generateId(), orderId, itemId, count];
      records.push(record);
    }
  }
  addRecords('注文_商品', records);
}
この関数でスプレッドシートに注文内容の記録をします。
さらに、createOrder関数の中でgenerateId関数とaddRecords関数という未定義の関数を呼び出しているので、この2つの関数も追加します。
以下のコードをコピーして追加で貼り付けてください。
function generateId(length=8) {
  const [alphabets, numbers]  = ['abcdefghijklmnopqrstuvwxyz', '0123456789'];
  const string  = alphabets + numbers;
  let id = alphabets.charAt(Math.floor(Math.random() * alphabets.length));
  for(let i = 0; i < length-1; i++) {
    id += string.charAt(Math.floor(Math.random() * string.length));
  }
  return id;
}

function addRecords(sheetName, records) {
  const ss = SpreadsheetApp.getActiveSpreadsheet();
  const sheet = ss.getSheetByName(sheetName);
  const lastRow = sheet.getLastRow();
  sheet.getRange(lastRow+1, 1, records.length, records[0].length).setValues(records);
}
これでスプレッドシートに記録ができます。
ただし、今はまだ記録するシートが作成できていないので、これを作成しましょう。
「注文」テーブルと「注文_商品」テーブルを作成します。
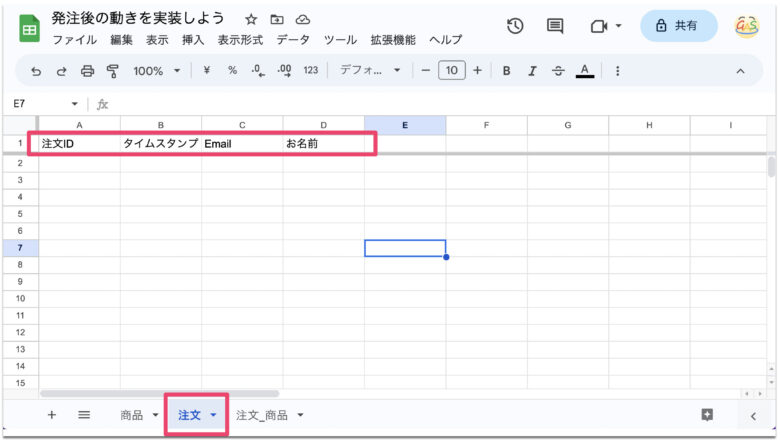
こちらが注文テーブルです。注文テーブルには「注文ID」「タイムスタンプ」「Email」「お名前」という4つのカラムを用意してください。
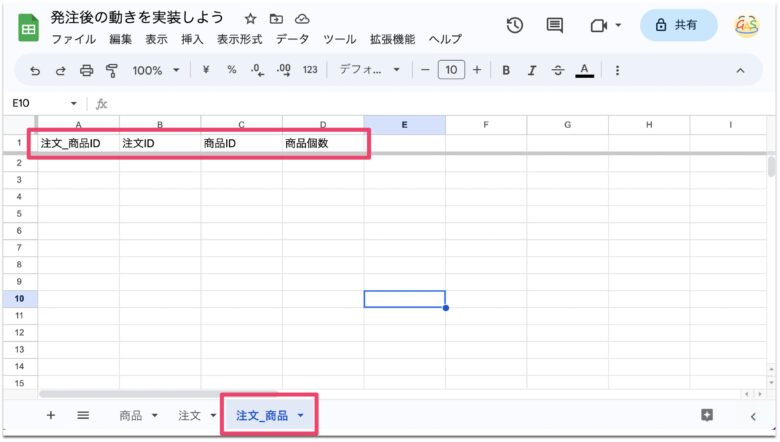
こちらが注文_商品テーブルです。注文_商品テーブルには「注文_商品ID」「注文ID」「商品ID」「商品個数」という4つのカラムを用意してください。
updateZaiko関数
次にupdateZaiko関数です。コード.gsに以下のコードを追加で貼り付けてください。
function updateZaiko(e, items) {
  const ss = SpreadsheetApp.getActiveSpreadsheet();
  const sheet = ss.getSheetByName('商品');

  for(const item of items) {
    const itemId = item['商品ID'];
    const zaiko = item['在庫数'];
    const count = Number(e.parameter[itemId]);
    if(count && count > 0) {
      const targetRow = sheet.getRange('A:A').createTextFinder(itemId).matchEntireCell(true).findNext().getRow();
      const targetCol = sheet.getRange('1:1').createTextFinder('在庫数').matchEntireCell(true).findNext().getColumn();
      sheet.getRange(targetRow, targetCol).setValue(zaiko - count);
    }
  }
}
これで発注完了後、在庫数を更新できます。
sendMail関数
最後にsendMail関数です。コード.gsに以下のコードを追加で貼り付けてください。
function sendMail(e, items) {
  const subject = `ご注文ありがとうございます。`;
  let html = `
    <table class="table">
      <thead>
        <tr>
          <th scope="col" class="text-left">商品</th>
          <th scope="col" class="text-right">単価</th>
          <th scope="col" class="text-right">個数</th>
          <th scope="col" class="text-right">金額</th>
        </tr>
      </thead>
      <tbody>
  `;

  let total = 0;
  for(const item of items) {
    const itemId = item['商品ID'];
    const itemName = item['商品名'];
    const unitPrice = item['単価'];
    const count = Number(e.parameter[itemId]);

    if(count > 0) {
      const price = unitPrice * count;
      total += price;

      html += `<tr>`;
      html += `<td class="text-left">${itemName}</td>`;
      html += `<td class="text-right">@¥${unitPrice.toLocaleString()}</td>`;
      html += `<td class="text-right">${count}</td>`;
      html += `<td class="text-right">¥${price.toLocaleString()}</td>`;
      html += `</tr>`;
    }
  }

  html += `<tr>`;
  html += `<td colspan="2" class="sum text-right">合計:</td>`;
  html += `<td colspan="2" class="sum text-right">¥${total.toLocaleString()}</td>`;
  html += `</tr>`;
  html += `</tbody>`;
  html += `</table>`;

  const template = HtmlService.createTemplateFromFile('mail');
  template.username = e.parameter.username;
  template.orderTable = html;
  const htmlBody = template.evaluate().getContent();

  const options = {
    'name': '発注システム',
    'bcc': Session.getEffectiveUser().getEmail(),
    'htmlBody': htmlBody,
  };

  GmailApp.sendEmail(e.parameter.email, subject, 'plain body', options);
}
この関数でmail.htmlというHTMLファイルを呼び出しているので、新たにHTMLファイルを作成します。
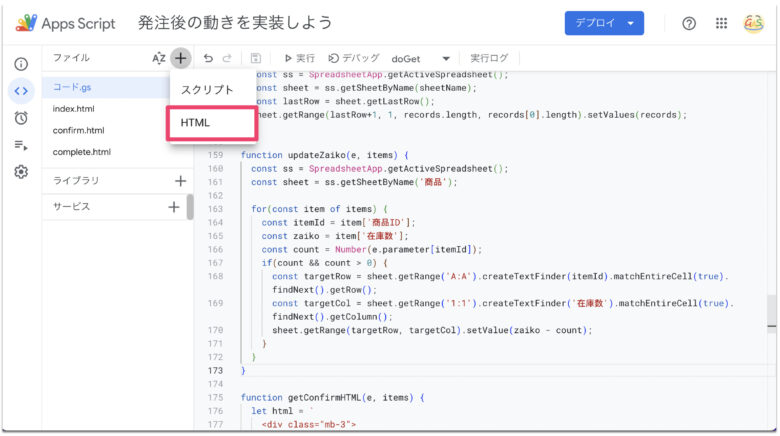
画面左上の「+」をクリックし、「HTML」をクリックしてください。
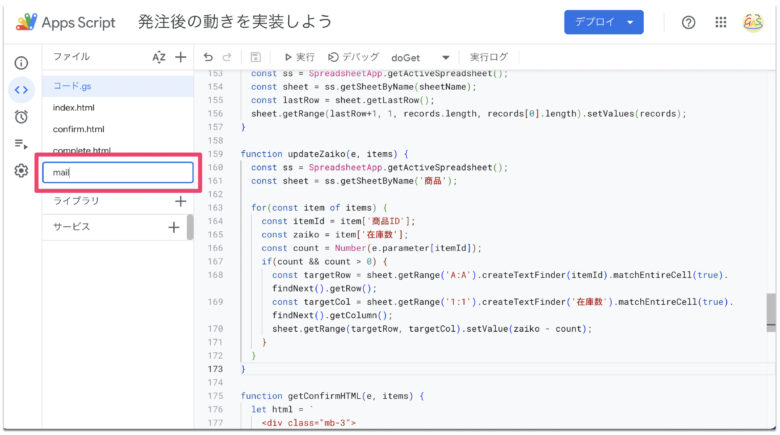
ファイル名は「mail」としてEnterしてください。
mail.htmlというファイルが作成されたら、デフォルトで用意されているコードは一度全消去します。
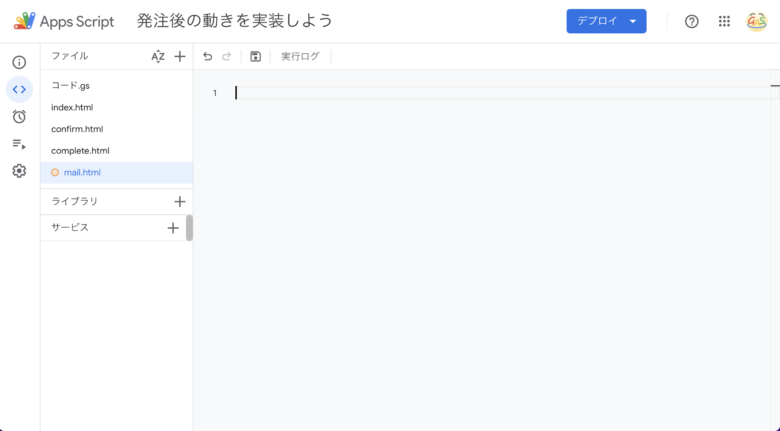
まっさらになったエディタに以下のコードをコピペしてください。
<!DOCTYPE html>
<html>
  <head>
    <base target="_top">
    <style>
      table{
        border-collapse: collapse;
      }
      th{
        min-width: 60px;
        padding: 8px;
        border-bottom: 2px black solid;
      }
      td{
        padding: 8px;
        border-bottom: 1px #dfdfdf solid;
      }
      .sum{
        border-top: 2px black double;
        border-bottom: 2px black solid;
        font-size: 20px;
      }
      .text-left{
        text-align: left;
      }
      .text-right{
        text-align: right;
      }
    </style>
  </head>
  <body>
    <div class="container">
      <p><?= username ?>様</p>
      <p>このたびはご注文ありがとうございます。</p>
      <p>以下の内容でご注文承りました。</p>
      <? output._ = orderTable ?>
      <p>どうぞよろしくお願いいたします。</p>
    </div>
  </body>
</html>
これで発注完了のメールが送付できるようになります。
デプロイして確認
ここまでできたらデプロイして確認してみましょう。
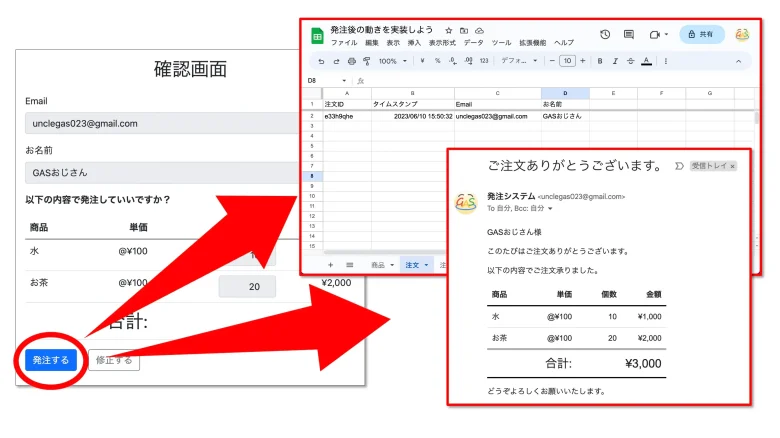
ためしに水10個、お茶20個を発注してみます。
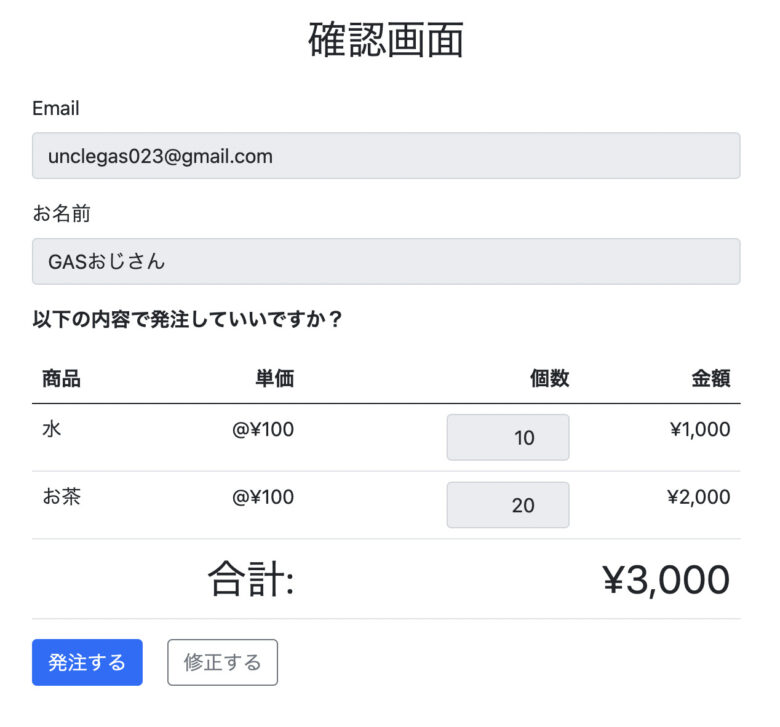
発注ボタンをおしてスプレッドシートを確認してみます。
まず、「注文」テーブルを確認すると、
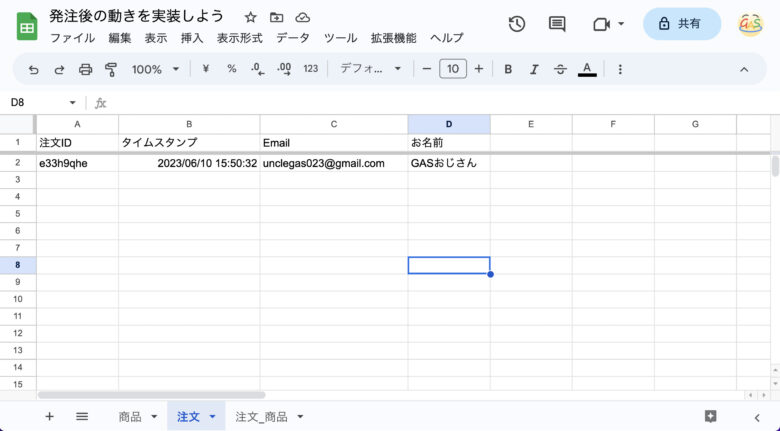
1件レコードが追加されています。
次に、注文_商品テーブルを確認すると、
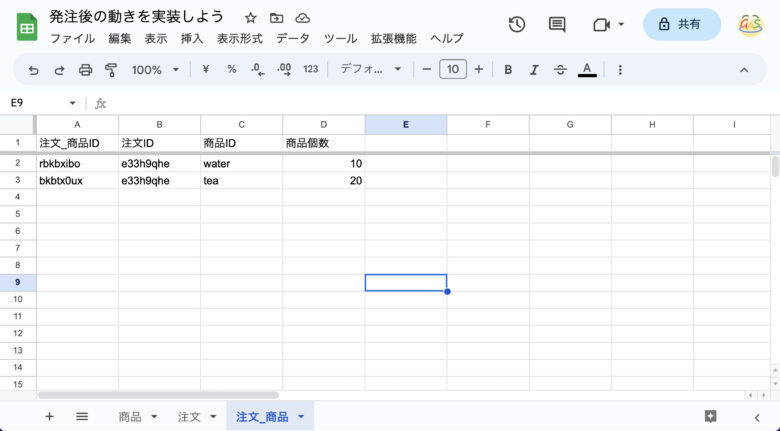
水10個とお茶20個の2件のレコードが追加されています。
また、商品テーブルで商品の個数を確認すると、
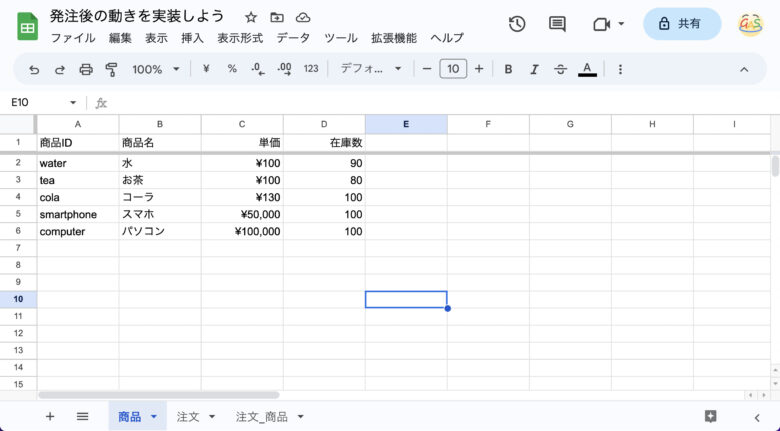
水が10個、お茶が20個消費されているのが確認できました。
最後に、メールの受信トレイを確認すると、
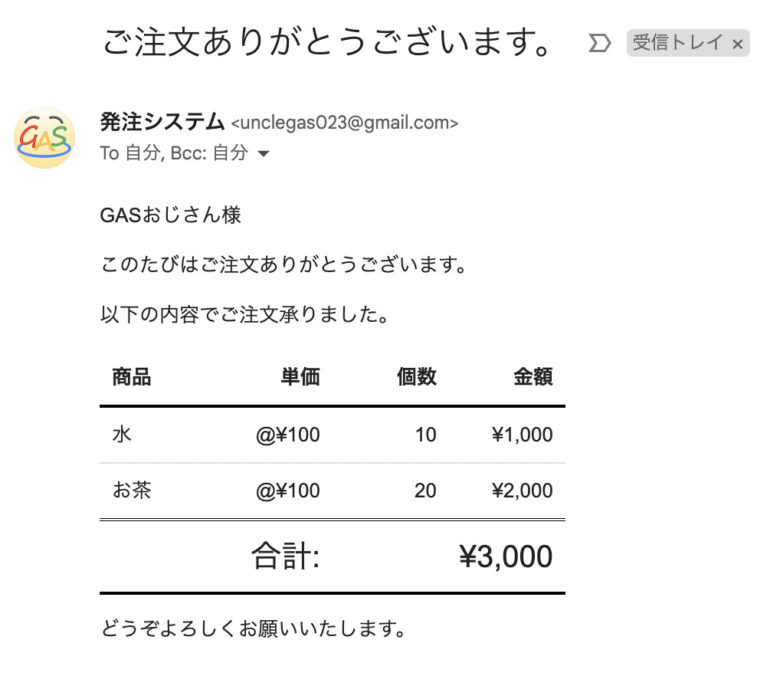
無事、発注完了メールも届いていることが確認できました!
まとめ
以上、発注完了後の動きを実装しました。
コードの量が多くなってきたので、コピペする際は抜け漏れやタイプミスなどが無いようご注意ください。
さて、完成形に近づいてきましたね。しかし現状のフォームでは、商品個数が0個で送信できてしまったり、入力途中で在庫切れになっても送信できてしまったりなど、問題点があります。
次回はそれらの問題を解決するために、バリデーションを実装していきましょう!

連載目次: GAS x HTMLで確認画面付きの本格的な発注フォームを作ろう
- 【GAS x HTML】確認画面付きの本格的な発注フォームを作る
- GASとHTMLで簡単なWebページを表示する方法
- 【GAS】Bootstrapを使ってフォーム画面を作る方法
- doPost関数で確認画面ページに遷移させよう
- 確認画面ページから発注完了ページに遷移させよう
- 【GASxHTML】スプレッドシートの商品データを動的に表示する
- フォームの入力内容を確認画面ページに渡そう
- 確認画面ページに「修正する」ボタンを実装しよう
- 確認画面ページの「発注する」ボタンクリック後の機能を実装しよう
- 【GASxHTML】フォームのバリデーションを実装しよう
- GASとHTMLで作ったWebアプリをスマホ対応させる方法
コメント