みなさんこんにちは!GASおじさんです。
前々回の記事では「スプレッドシート画面上でGASを実行する方法4選」をご紹介しました。

この記事の中で、
サイドバーから実行する
という方法をご紹介したのですが、
今回はこちらの実装方法について解説していきたいと思います。
Youtubeでも解説していますので動画で見たい人は以下からどうぞ!
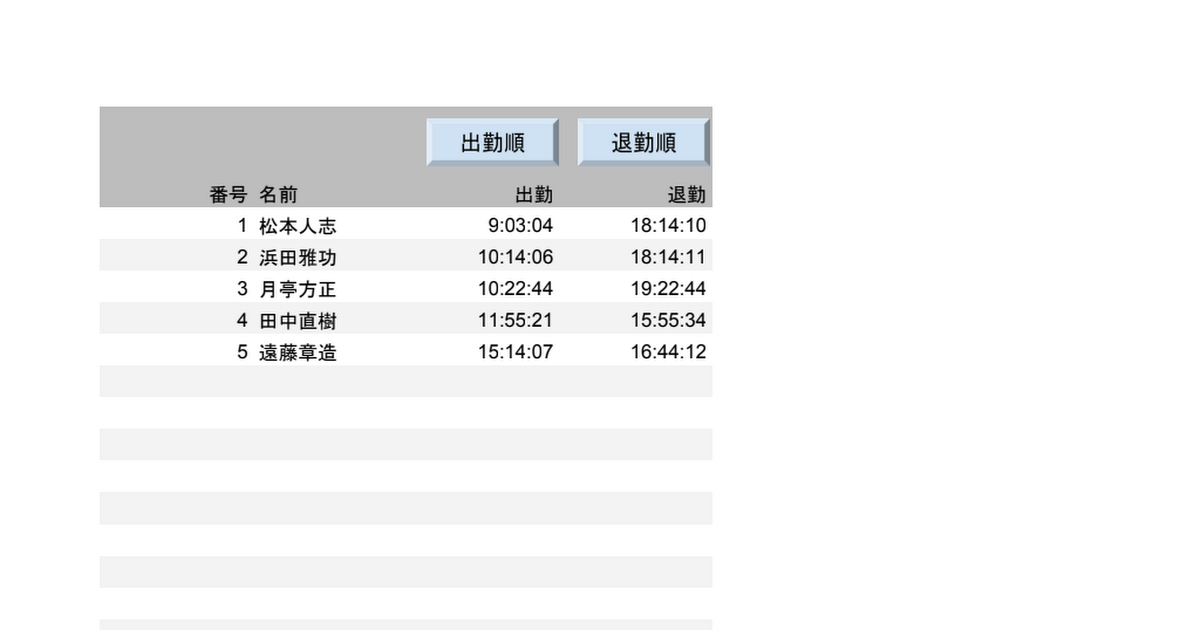
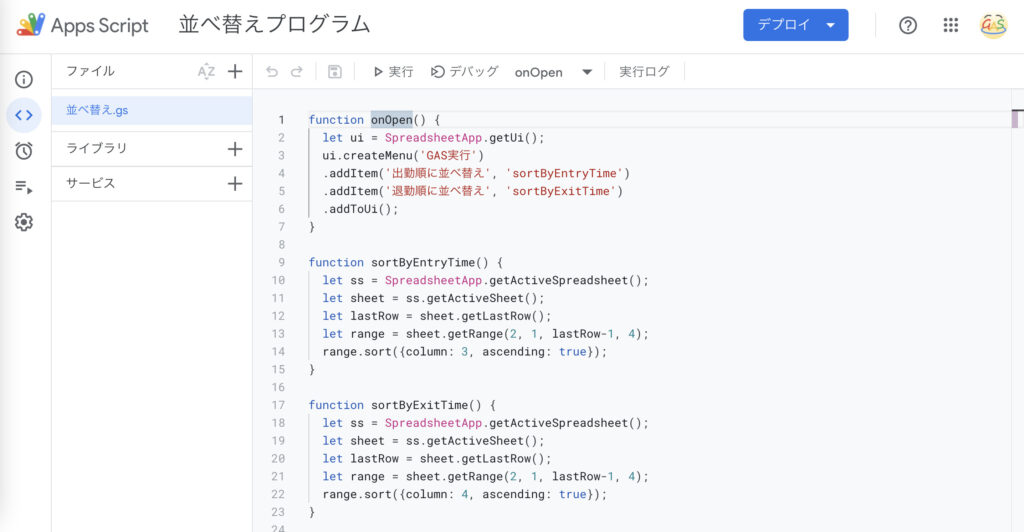
サンプル出勤表
今回は以下のサンプルを使って説明していきます。必要に応じてコピーしてご利用ください。
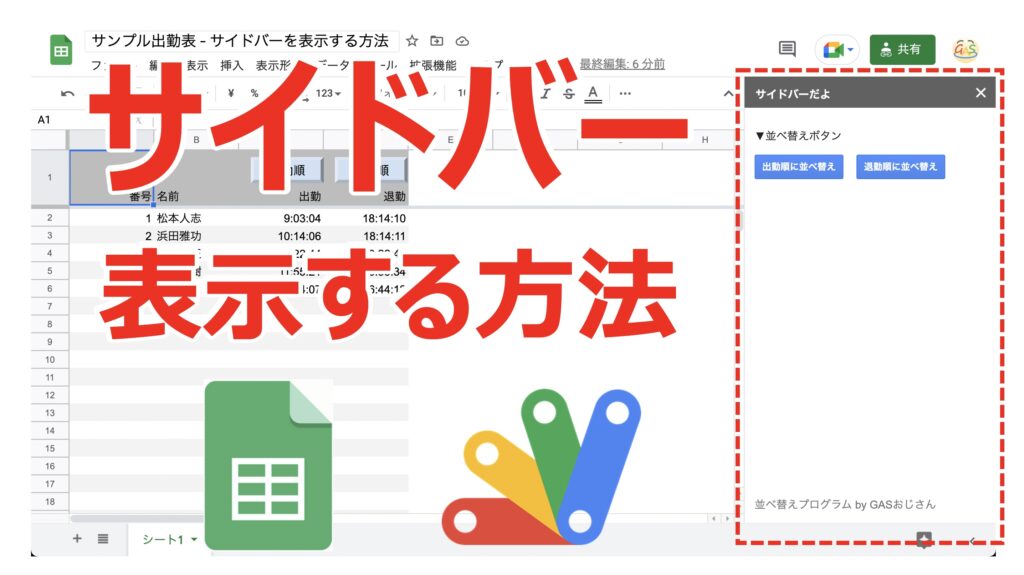
スプレッドシート画面にサイドバーを表示する方法
それでは本題です。
今回のゴールは、スプレッドシート画面の右側に、以下のようなサイドバーを作ることです。
スクリプトファイルを作成してコードをコピペ
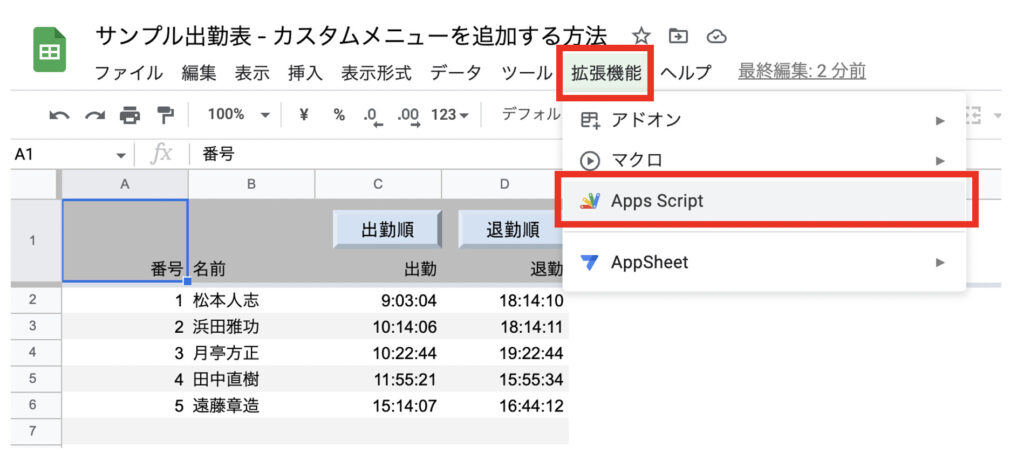
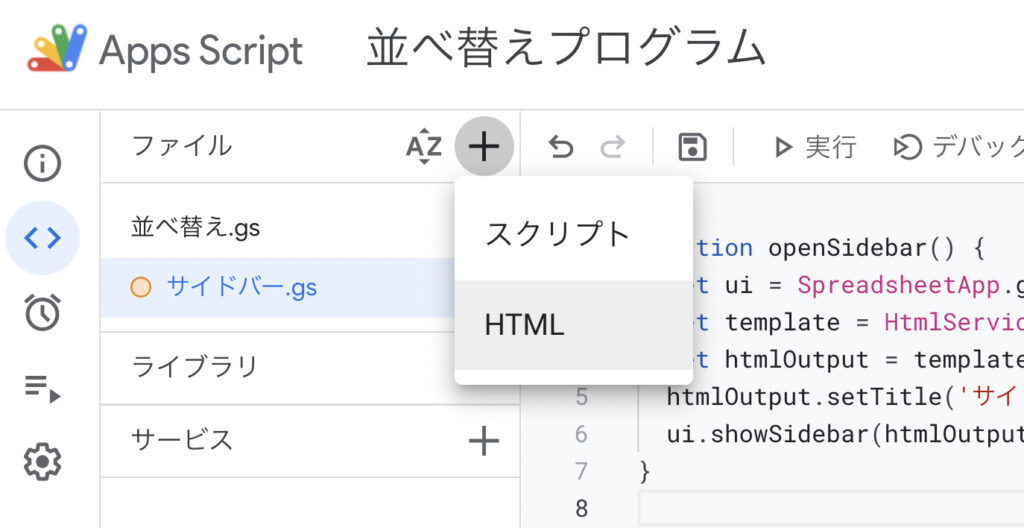
まずは、「拡張機能」から「Apps Script」を開いてください。
すると、以下のようなスクリプト画面が開かれます。
GASファイル(サイドバー.gs)の作成
次に新しいファイルを作成します。左上の「+」ボタンから「スクリプト」を選択してください。
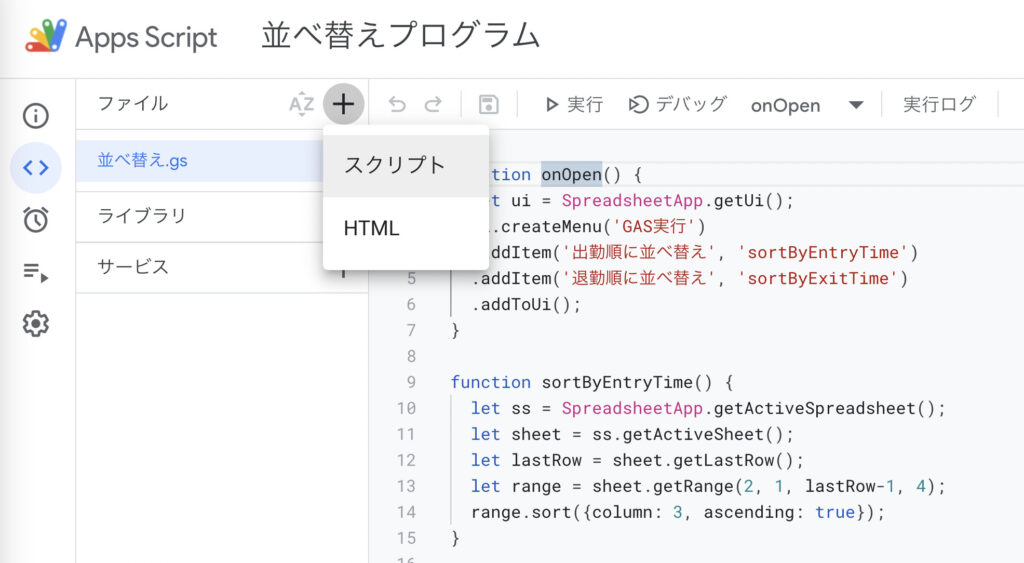
ファイル名は「サイドバー.gs」とでもしておきましょう。
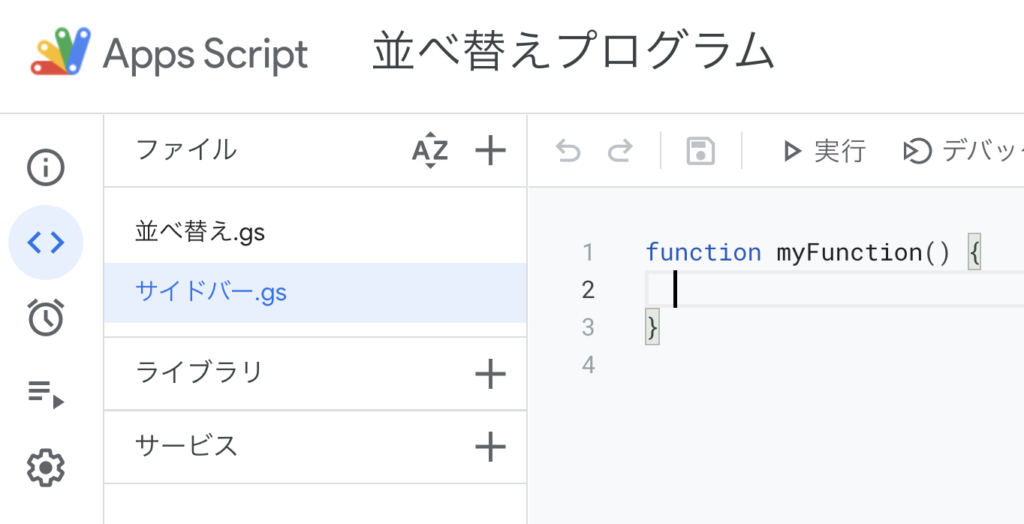
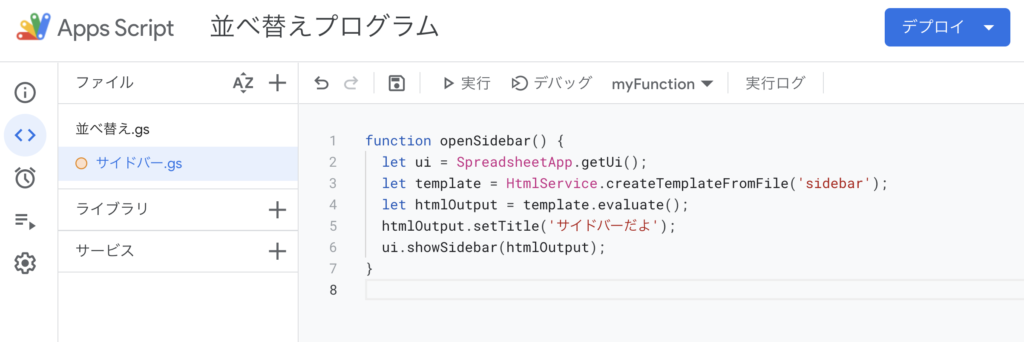
作成した「サイドバー.gs」に、以下のコードをコピペしてください。
function openSidebar() {
  const ui = SpreadsheetApp.getUi();
  const template = HtmlService.createTemplateFromFile('sidebar');
  const htmlOutput = template.evaluate();
  htmlOutput.setTitle('サイドバーだよ');
  ui.showSidebar(htmlOutput);
}
上記のコードをコピーしてエディタに貼り付けてください。
HTMLファイル(sidebar.html)の作成
次に、左上の「+」ボタンから、「HTML」を選択して新しいHTMLファイルを作成してください。
ファイル名は「sidebar.html」としておきましょう。
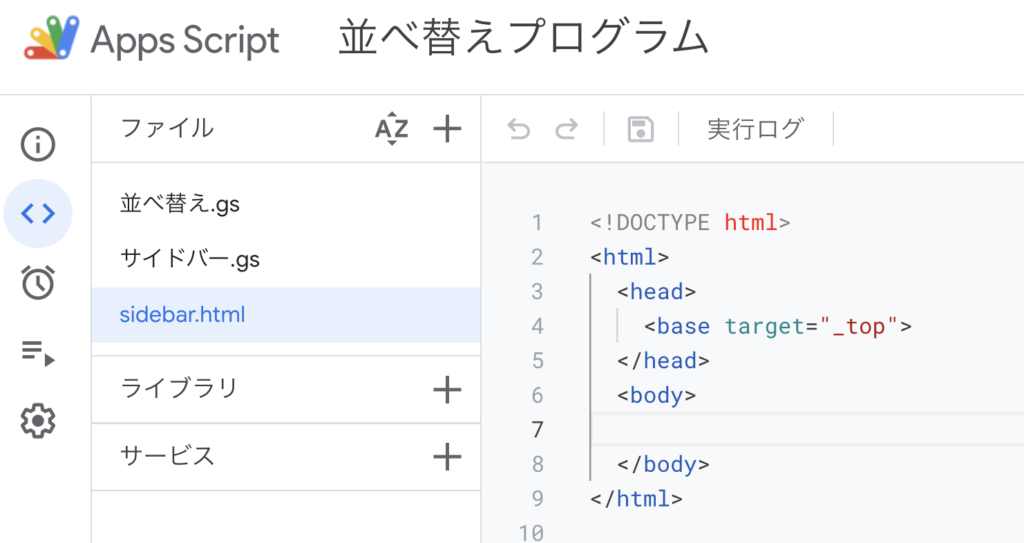
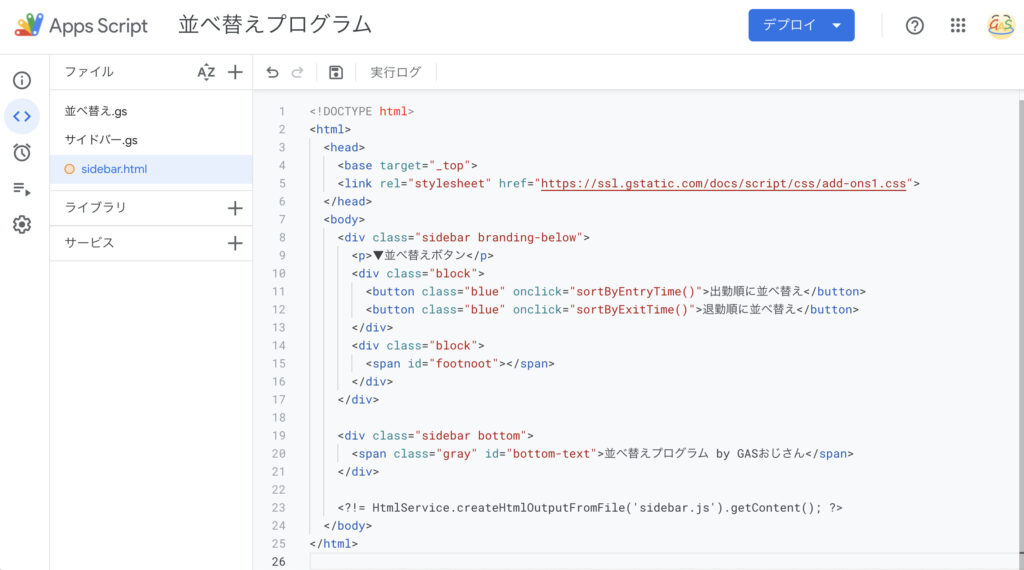
作成した「sidebar.html」に、以下のコードをコピペしてください。
<!DOCTYPE html>
<html>
  <head>
    <base target="_top">
    <link rel="stylesheet" href="https://ssl.gstatic.com/docs/script/css/add-ons1.css">
  </head>
  <body>
    <div class="sidebar branding-below">
      <p>▼並べ替えボタン</p>
      <div class="block">
        <button class="blue" onclick="sortByEntryTime()">出勤順に並べ替え</button>
        <button class="blue" onclick="sortByExitTime()">退勤順に並べ替え</button>
      </div>
      <div class="block">
        <span id="footnote"></span>
      </div>
    </div>

    <div class="sidebar bottom">
      <span class="gray" id="bottom-text">並べ替えプログラム by GASおじさん</span>
    </div>

    <?!= HtmlService.createHtmlOutputFromFile('sidebar.js').getContent(); ?>
  </body>
</html>
上記のコードをコピーしてエディタに貼り付けてください。
JavaScriptファイル(sidebar.js.html)の作成
次に、左上の「+」ボタンから、「HTML」を選択して新しいHTMLファイルを作成してください。
ファイル名は「sidebar.js」としておきます。
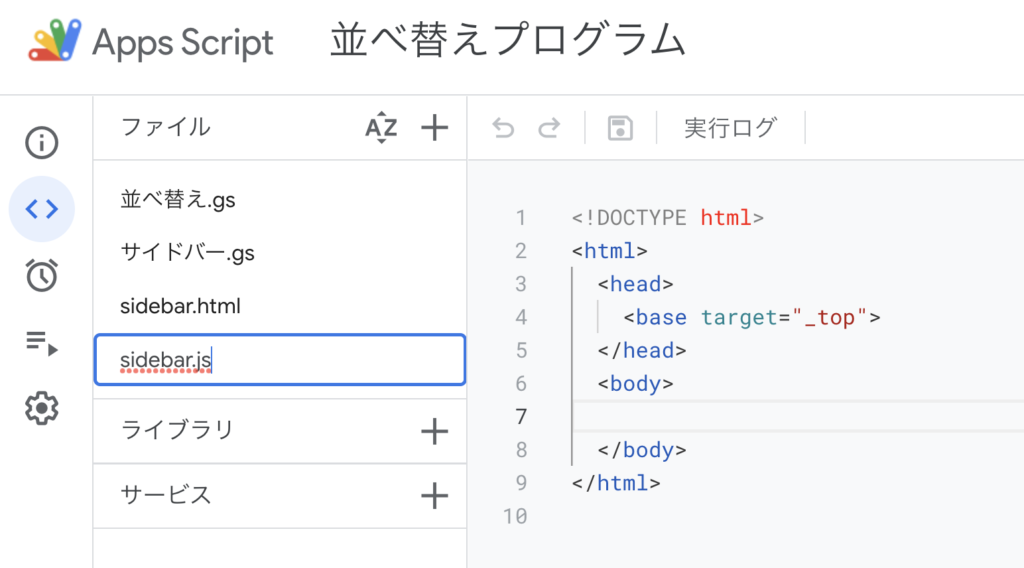
※ファイル名を確定すると「sidebar.js.html」となりますが気にせずそのまま進めて構いません。
作成した「sidebar.js.html」に、以下のコードをコピペしてください。
<script>

function updateFootNote() {
  document.getElementById("footnote").innerHTML = '';
}

function sortByEntryTime(){
  document.getElementById("footnote").innerHTML = 'スクリプト実行中...';
  google.script.run.withSuccessHandler(updateFootNote).sortByEntryTime();
}

function sortByExitTime(){
  document.getElementById("footnote").innerHTML = 'スクリプト実行中...';
  google.script.run.withSuccessHandler(updateFootNote).sortByExitTime();
}

</script>
上記のコードをコピーしてエディタに貼り付けてください。
openSidebar関数を実行
コードのコピペができたら、ファイルを保存して、サイドバー.gsのopenSIdebar関数を実行してください。
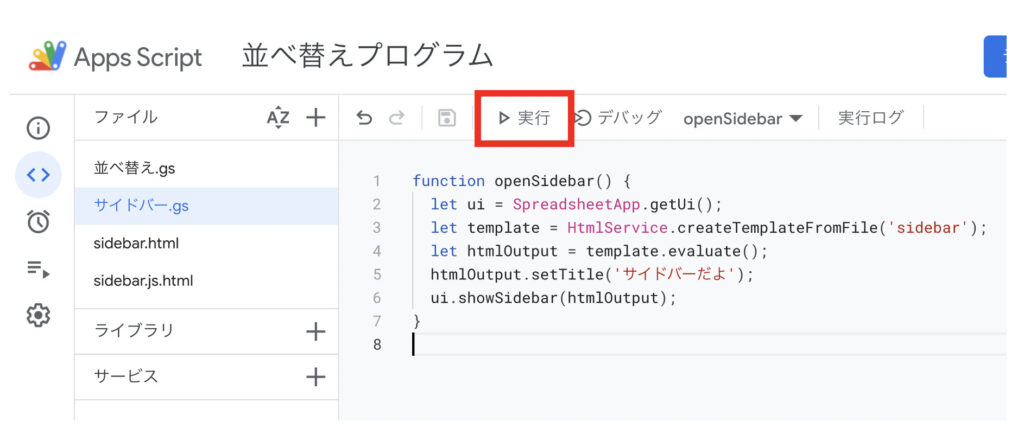
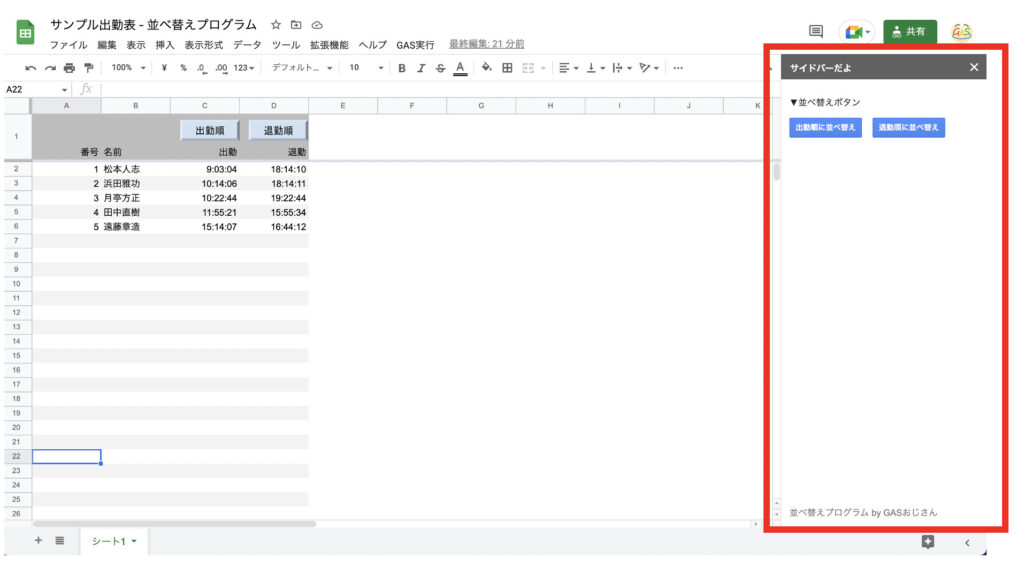
すると…
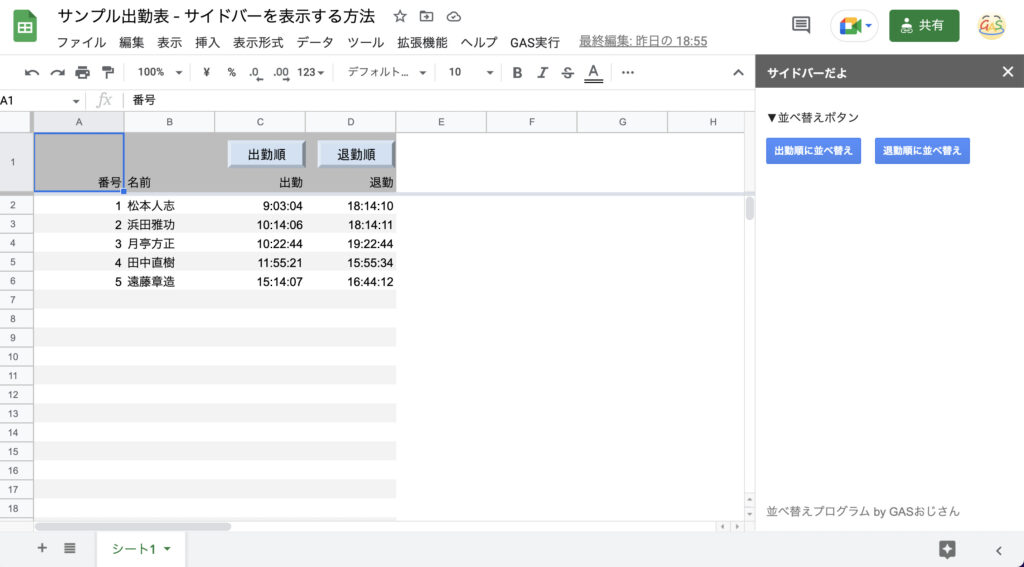
スプレッドシート画面にサイドバーが表示されました!
サイドバーの中には、「出勤順に並べ替え」と「退勤順に並べ替え」のボタンがあります。
それぞれをクリックしてみると、sortByEntryTime関数とsortByExitTime関数が実行できることが確認できるかと思います。
コードの解説
今回追加した「サイドバー.gs」「sidebar.html」「sidebar.js.html」それぞれのコードについて解説します。
サイドバー.gs
まずは以下のサイドバー.gsについてです。
function openSidebar() {
  const ui = SpreadsheetApp.getUi();
  const template = HtmlService.createTemplateFromFile('sidebar');
  const htmlOutput = template.evaluate();
  htmlOutput.setTitle('サイドバーだよ');
  ui.showSidebar(htmlOutput);
}
まず以下のコードでUIオブジェクトを取得します。
const ui = SpreadsheetApp.getUi();次に「sidebar.html」を読み込むためのコードを記述します。
const template = HtmlService.createTemplateFromFile('sidebar');
const htmlOutput = template.evaluate();
htmlOutput.setTitle('サイドバーだよ');
この際、createTemplateFromFileメソッドに与える引数が、読み込むHTMLファイル名と合致するようにしましょう。また、htmlOutputに対してsetTitleメソッドを使うことで、サイドバーのタイトルを指定することができます。
最後にUIオブジェクトに対して、showSidebarメソッドを使います。その際引数に生成したhtmlOutputを与えます。
ui.showSidebar(htmlOutput);あらためて、完成形のコードはこちら。
function openSidebar() {
  const ui = SpreadsheetApp.getUi();
  const template = HtmlService.createTemplateFromFile('sidebar');
  const htmlOutput = template.evaluate();
  htmlOutput.setTitle('サイドバーだよ');
  ui.showSidebar(htmlOutput);
}
sidebar.html
次にsidebar.htmlについてです。
<!DOCTYPE html>
<html>
  <head>
    <base target="_top">
    <link rel="stylesheet" href="https://ssl.gstatic.com/docs/script/css/add-ons1.css">
  </head>
  <body>
    <div class="sidebar branding-below">
      <p>▼並べ替えボタン</p>
      <div class="block">
        <button class="blue" onclick="sortByEntryTime()">出勤順に並べ替え</button>
        <button class="blue" onclick="sortByExitTime()">退勤順に並べ替え</button>
      </div>
      <div class="block">
        <span id="footnote"></span>
      </div>
    </div>

    <div class="sidebar bottom">
      <span class="gray" id="bottom-text">並べ替えプログラム by GASおじさん</span>
    </div>

    <?!= HtmlService.createHtmlOutputFromFile('sidebar.js').getContent(); ?>
  </body>
</html>
今回特に大事なポイントは、次の1行です。
<?!= HtmlService.createHtmlOutputFromFile('sidebar.js').getContent(); ?>この1行があることによって、別ファイルの「sidebar.js.html」を読み込むことができます。
また、次のbuttonタグで並べ替えボタンを実装しているのですが、
<button class="blue" onclick="sortByEntryTime()">出勤順に並べ替え</button>
<button class="blue" onclick="sortByExitTime()">退勤順に並べ替え</button>
onclick属性の中に実行したい関数名を記述しています。この関数については、次のsidebar.js.htmlで定義することになります。
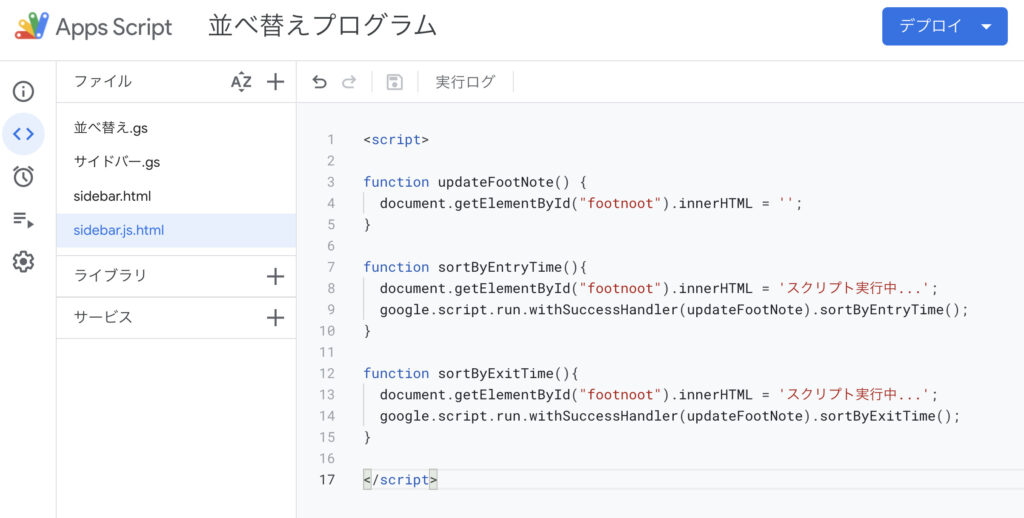
sidebar.js.html
最後にsidebar.js.htmlについてです。
<script>

function updateFootNote() {
  document.getElementById("footnote").innerHTML = '';
}

function sortByEntryTime(){
  document.getElementById("footnote").innerHTML = 'スクリプト実行中...';
  google.script.run.withSuccessHandler(updateFootNote).sortByEntryTime();
}

function sortByExitTime(){
  document.getElementById("footnote").innerHTML = 'スクリプト実行中...';
  google.script.run.withSuccessHandler(updateFootNote).sortByExitTime();
}

</script>
sidebar.htmlで記述した関数は、こちらのファイルで定義することになります。
注意点としては、ここで定義する関数と、サイドバー.gsファイルで定義する関数は別物ということです。
サイドバー.gsにおいても、sortByEntryTime関数とsortByExitTime関数というのを定義していましたが、
サイドバー.gsファイルで定義された関数は、Googleのサーバー内で動くファイルである一方で、sidebar.js.htmlで定義する関数は、ブラウザ上で動く関数です。
2つのファイルは似て非なるものなので、いろいろコードをいじってみて、仕組みを理解していきましょう!
連載目次
- スプレッドシート画面上でGASを実行する方法4選
- スプレッドシートにカスタムメニューを追加する方法
- スプレッドシートにサイドバーを表示する方法(←イマココ)
コメント
サイドバーを作る練習として使用させていただき、つまづくことなく上手くできました。ありがとうございました!
嬉しいコメントありがとうございます!お役に立ててよかったです✨